As I stepped into a new chapter of my career, I wanted my goodbye to mean something beyond a card or a store-bought gift. I’d wanted to give my closer colleagues something made with intention and gratitude, something they could actually use and enjoy long after our last day together. That’s when it hit me: handmade soap.
Back during the COVID circuit-breaker period, I had dabbled in soap making as a way to stay occupied at home. It was a calming and creative project, and it had been sitting on the back burner ever since, so this felt like the perfect time to revive an old passion.
I’m not one for the word “farewell”. The word seems to carry a weight that suggests finality, and I’d like to think that the connections we’ve built don’t simply clock out on our last day.
The Handmade Passion Project
For this batch, I went with melt and pour soap base. An ideal choice for beginners and hobbyists, like me, who want beautiful and quick results without the complexity of working with lye.
Since I have sensitive skin myself, I was particular about sourcing organic soap bases, eventually importing them from several countries for the different skincare benefits.
It was quite a bit of a process, but worth every bit of effort. And who knows, my next project might just be cold-process soap from scratch. Feeling rather excited!
Step-by-Step: How I Made the Soaps
Here’s exactly how I made them, in case you’d like to try it yourself:
- Cut the soap base into small cubes.
Smaller, even pieces melt more uniformly and reduce the risk of overheating. - Melt using the double boiler method.
Place the cubes in a heat-safe bowl over a pot of simmering water. Stir gently in between until the base is completely smooth and lump-free. - Let it cool slightly, then add colour and fragrance.
I stirred in soap-safe dye and essential oils at this stage. I don’t recommend using fragrance oils as they are usually made of chemicals instead of actual flowers and plants. Going slowly ensures even distribution without causing the mixture to clump. - Pour into moulds.
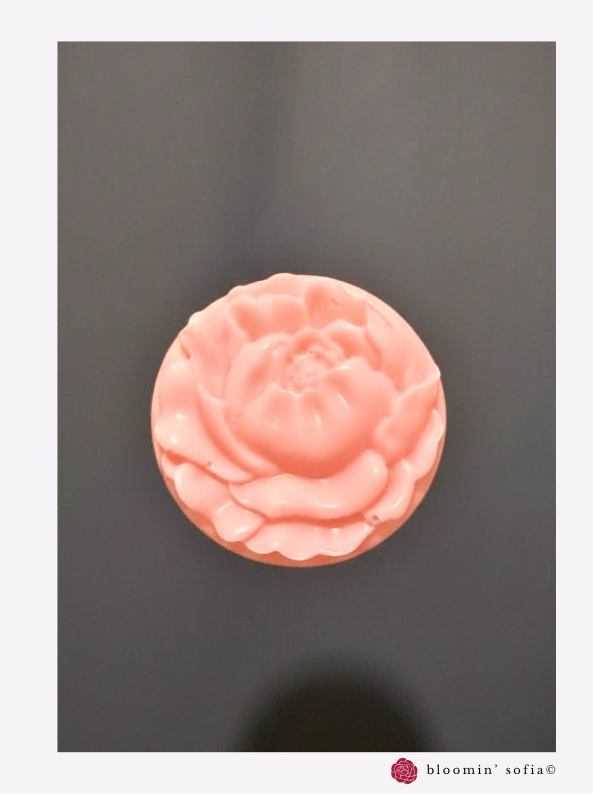
I’ll be honest, I had a lot of fun picking out the moulds. The rabbit mould is more finicky to use while the flower ones are simply gorgeous. Cute designs really do elevate the whole gifting experience. - Leave to set and unmould.
Depending on the size and ambient temperature, soaps typically harden within a few hours to overnight. Once firm, I unmoulded them carefully and packaged them up with my sticker.
Note: I omitted the step of using rubbing alcohol to remove the bubbles, for fear of changing the scent of the essential oils. Despite how frustrating the bubbles looked, I can’t say I am regretting the choice too much.
I am lowkey proud of my handiwork; the final soaps look great (in my not-so humble opinion) and are all ready to make for a gift.
The Takeaway
The process takes time. And yes, it was tedious. There were long moments of waiting, second-guessing (should I just buy something storemade instead?), and soap residue absolutely everywhere. But it was still satisfying crafting something with my own hands, having everything come together in the end, and giving them to people who have been part of my journey.
So, if you’ve been thinking about trying soap making, whether as a hobby, a gift idea, or just a creative outlet, I hope this nudges you to go for it.
On a personal note, my career here has been nothing short of a masterclass: in my craft, in people, and in myself. Every challenge was a lesson in disguise, and every opportunity a reminder of how much there is still to learn and to give. I am profoundly grateful for this season of my life, for the colleagues who made it meaningful, and for the growth that comes from doing hard things.
Here’s to new beginnings, with gratitude in my heart and optimism leading the way.
Comment
[…] rather ambitious after my soapmaking journey turned out a more than pleasing batch, I decided to try my hand at making solid perfume next. After […]